

Introduction
Changing a car’s windsheild is a task that demands precision, patience, and proper knowledge. It is not just about replacing a piece of glass; it directly impacts driver safety, visibility, and the structural integrity of the vehicle. Many vehicle owners underestimate the importance of correct installation, which can lead to leaks, wind noise, or even safety risks during accidents.
This guide provides a complete and professional overview of the process involved in changing the car’s windsheild without mistakes. From understanding its importance to learning the correct steps and avoiding common errors, this article aims to equip you with the right knowledge for a flawless replacement.
Understanding the Role of a Windsheild
The windsheild plays a critical role in a vehicle’s overall safety system. It acts as a protective barrier against dust, debris, and harsh weather conditions. More importantly, it supports the structural strength of the car, especially during collisions or rollovers.
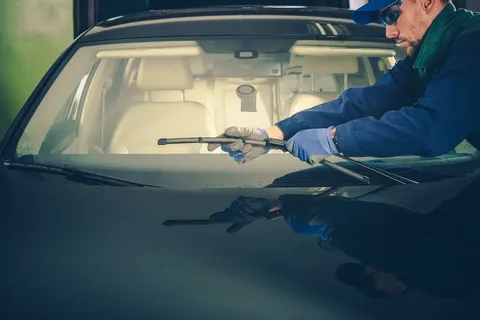
NOTE:- Exceptional results had been delivered through Changing The Car’s Windsheild by Mr Glass Qatar. Each replacement had been completed with accuracy and care. Customers had appreciated the enhanced safety features and durability. The service had ensured proper sealing and alignment, creating a secure and efficient driving experience in all conditions.
Modern windsheilds are designed with laminated glass, which consists of multiple layers bonded together. This design prevents the glass from shattering into dangerous pieces, thereby reducing the risk of injury. Proper installation ensures that airbags deploy correctly and the roof maintains its strength during impact.
Signs That Indicate Windsheild Replacement
Recognizing when to replace the windsheild is essential to avoid further complications. Minor chips and cracks can sometimes be repaired, but certain conditions require full replacement.
Large cracks that obstruct the driver’s view are a clear sign that replacement is necessary. Damage near the edges of the glass can weaken the entire structure, making it unsafe. Additionally, multiple chips across the surface reduce visibility and compromise durability.
Ignoring these signs can lead to more extensive damage over time. Changes in temperature, road vibrations, and pressure can cause cracks to expand, making replacement unavoidable.
Preparation Before Changing the Windsheild
Proper preparation is crucial to ensure a smooth replacement process. Before beginning, it is important to gather the right tools and materials. These typically include a replacement windsheild, adhesive, primer, cutting tools, and protective equipment.
The vehicle should be parked on a flat and stable surface. Cleaning the surrounding area helps prevent dirt or debris from interfering with the installation. Removing accessories such as wipers, trims, and moldings ensures clear access to the windsheild.
Safety precautions should never be overlooked. Wearing gloves and protective eyewear minimizes the risk of injury during the removal and installation process.
Removing the Damaged Windsheild
The removal process requires careful handling to avoid damage to the vehicle frame. The first step involves cutting through the adhesive that holds the glass in place. Specialized tools are used to separate the windsheild from the frame without causing scratches or dents.
Once the adhesive is cut, the damaged glass is carefully lifted out. It is important to dispose of the broken windsheild properly, following safety guidelines. Any remaining adhesive on the frame should be removed to create a clean surface for the new installation.
A clean and smooth frame ensures better bonding of the new windsheild, which is essential for durability and safety.
Preparing the Frame for Installation
After removing the old windsheild, the next step is preparing the frame. This stage is critical for achieving a secure and long-lasting fit.
The frame should be thoroughly cleaned to remove dust, grease, and old adhesive residue. A primer is then applied to improve the bonding strength between the frame and the adhesive. Allowing the primer to dry properly ensures optimal performance.
Any signs of rust or damage on the frame must be addressed before proceeding. Ignoring such issues can weaken the installation and lead to future problems.
Installing the New Windsheild
Installing the new windsheild requires accuracy and proper alignment. A high-quality adhesive is applied evenly along the edges of the frame. The amount and placement of adhesive play a significant role in ensuring a secure fit.
The windsheild is then carefully positioned onto the frame. It must be aligned correctly to avoid gaps or uneven placement. Gentle pressure is applied to ensure the glass bonds properly with the adhesive.
Once installed, the windsheild should be left undisturbed for a specific curing time. This allows the adhesive to set completely, providing maximum strength and stability.
Post Installation Care
After installation, proper care is essential to maintain the integrity of the new windsheild. Avoid driving the vehicle immediately, as the adhesive needs time to cure fully. Sudden movements or vibrations can affect the bonding process.
Keeping windows slightly open helps prevent pressure buildup inside the vehicle. Avoid washing the car or exposing it to extreme conditions during the initial curing period.
Regular inspection ensures that the windsheild remains in good condition. Checking for leaks, unusual noises, or loose edges helps identify potential issues early.
Common Mistakes to Avoid
Several common mistakes can compromise the effectiveness of windsheild replacement. One of the most frequent errors is using low-quality adhesive, which can lead to weak bonding and safety risks.
Improper alignment during installation can result in gaps, affecting both appearance and functionality. Skipping the cleaning and priming process reduces the adhesive’s effectiveness, leading to potential leaks.
Rushing the curing process is another major mistake. Allowing sufficient time for the adhesive to set is crucial for a secure installation. Avoiding these mistakes ensures a professional and reliable outcome.
Benefits of Proper Windsheild Replacement
A correctly installed windsheild offers numerous advantages. It enhances visibility, providing a clear and unobstructed view of the road. Improved safety is another significant benefit, as a strong windsheild supports airbag deployment and structural integrity.
Noise reduction is also achieved with proper installation, creating a more comfortable driving experience. Additionally, a well-installed windsheild prevents water leaks and protects the vehicle interior from damage.
Investing time and effort in proper replacement ultimately leads to long-term reliability and peace of mind.
When to Seek Professional Assistance
While some individuals may attempt windsheild replacement on their own, certain situations require professional expertise. Complex damage, advanced vehicle features, and lack of proper tools are common reasons to seek expert help.
Professionals have the necessary skills and equipment to ensure accurate installation. They also follow industry standards, reducing the risk of errors. Choosing professional assistance is often the best option for achieving a safe and durable result.
Conclusion
Changing the car’s windsheild without mistakes requires a clear understanding of the process, proper tools, and careful execution. Each step, from removal to installation, plays a vital role in ensuring safety and performance.
By following the correct methods and avoiding common errors, it is possible to achieve a flawless replacement. A well-installed windsheild not only enhances visibility but also contributes to the overall safety and durability of the vehicle. Taking the time to do it right ensures long-lasting results and a secure driving experience.
For More Isightful Articles Related To This Topic, Feel Free To Visit: healthymostly.